Hiya! Back again! I've been a bit busy since I last posted *ahem*, almost three months ago. I've done some sewing, mostly for other people, and as I mentioned in my last post, WORKING! I loooove where I work. I'm working part time at
Glowing Sky, which is a company who make merino clothing. The wool is grown in NZ, and the company manufactures here in NZ too. It gives me a warm glow to work for people who are so committed to NZ, and to know that no sweatshop labour is involved in making the clothes! And having to wear it as work uniform is no hardship either!
Anyway, this lovely merino really lends itself to bold accessories, and I've long wanted to make myself a really wide corset belt, so finally got around to it last week. The pattern is from Burda 11/03, #129.
Exhibit A: (top and skirt are from Glowing Sky.) Side turned head is less about artistic posing and more about the manky, unsightly coldsore currently on my lip.
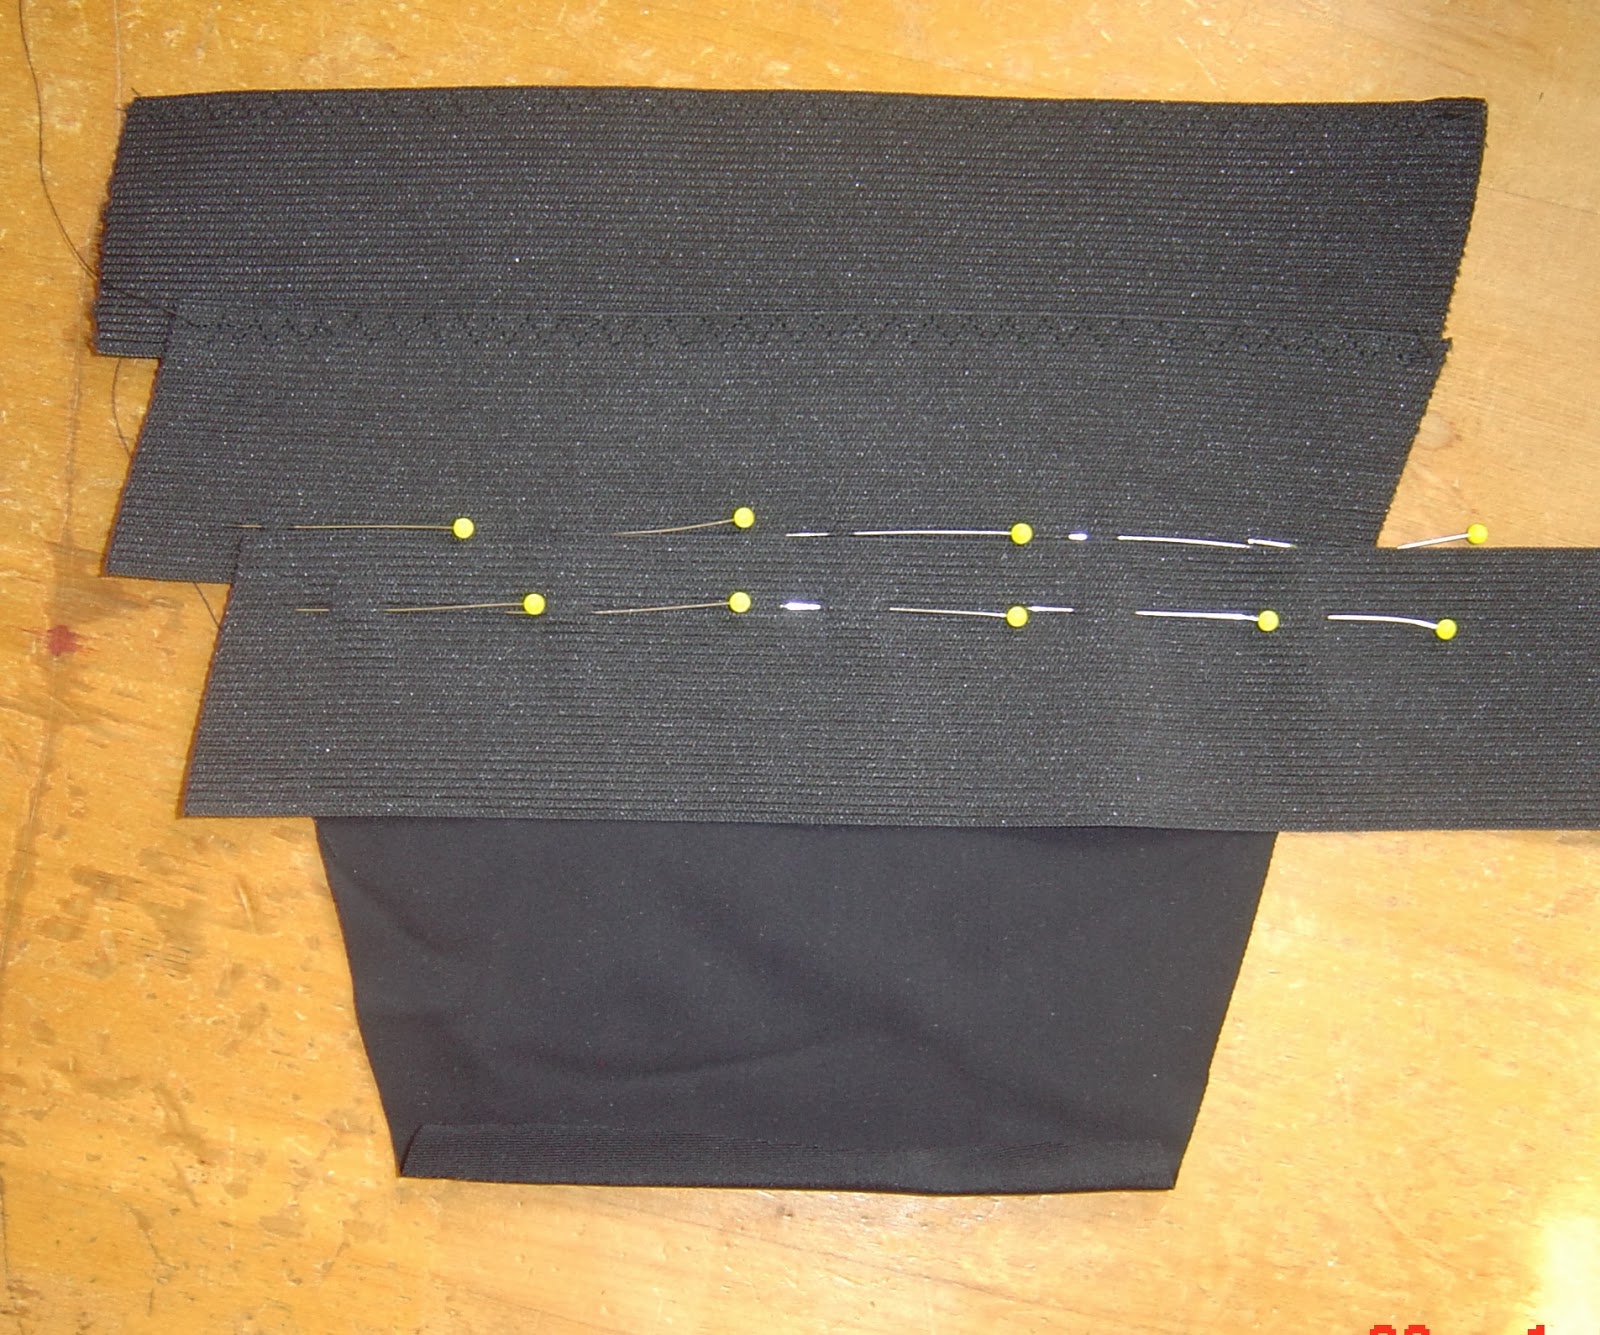
Back. The black panel at CB is made of strips of elastic sewn to a lycra backing.
And this is how I wore it to work. The shrug is Glowing Sky too. Note to self: wear a better bra.
And that worked so well that I made another one. This fabric was left over scraps from a handbag I cut out years ago and have yet to sew up. It's pretty flimsy, so I fused two layers of lightweight interfacing to the face fabric and one to the (much beefier) backing, which worked perfectly.
Back. Exactly the same construction.
The silver belt was made from three layers - face fabric, buckram, backing fabric. The face fabric wrinkles a bit when worn because it has a bit of stretch and I should have cut it slightly smaller to allow for that. You live and learn.
The back panel is just strips of 5cm elastic, which I sewed to a backing of swimsuit lycra, to give it more beef.
When making the 2nd one I found the bulk of the seam intersections was near impossible to reduce/flatten. No way would I wear this mess!
So I used a strap seam. I cut away all the seam allowance and sewed each side to a strip of fabric at the back so they butted exactly, then sewed binding over the front. After this shot I inserted boning which made it look even better.
Going back a bit, one of the projects eating into my sewing time before Christmas was this trench coat. Keely was to be Godmother to a Very Special Baby, and the best gift she could think of was to commission me to make something. Between us we came up with this. Influenced very largely by
this one which I had pinned on Pinterest.
And in the mean time I am beavering away on Alabama Chanin projects, as always. While the kids are home on holiday I can do this in tiny bursts while constantly interrupted. I'm working on a 4 panel skirt, and I have a matching 4 panel top to go with it as well. IF SUMMER EVER ARRIVES.
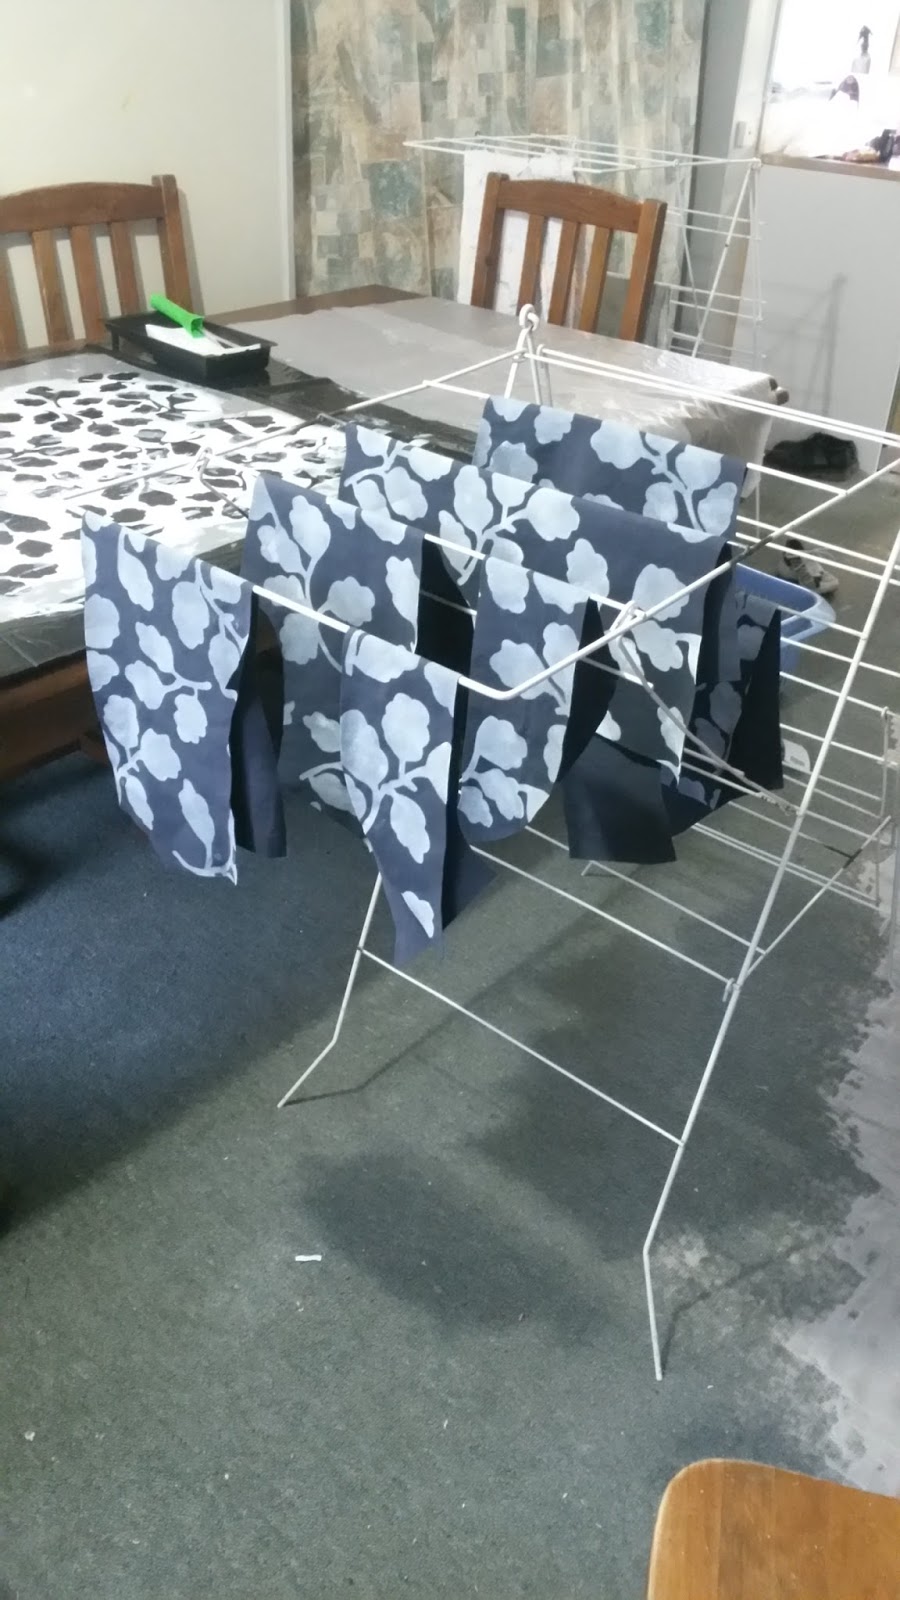
To start this project I put off this project - the rasberry/maroon rose stencil dress I have wanted to make for months. I finally found the right shade of rasberry and got stuck in. Then I thought, perhaps I should make a summery outfit, and do the dress (which I can wear year round) nearer winter.
As far as Dunedin's summer is concerned, lets just say it's a good thing I work in a store that sells merino clothes!